Last week I read about a new release of a fork of the Plan9 Operating System from the 9Front crew. The release is called "Human Biologics" and the new feature list was intriguing. There was now default support for git, and ssh, and some improvements to audio were included.
- audio(1) - mp3, ogg, flac, ulaw, wav
I had heard about Plan9 on an off for years. I wondered what sorts of audio and MIDI support might be in this OS, so I gave it a ride. What follows is a short account of some things I learned.
What is Plan9 and what is 9Front?
Plan9 was the follow-on Operating System developed by the folks who developed Unix at Bell Labs. Ken Thompson, Rob Pike et. al. took what they learned from developing Unix and applied it to what they wanted in a follow-on OS. It's most notable feature is its reliance on the file system for mapping devices, services and all sorts of communication. Another noteworthy feature is that a bit-mapped display is assumed, which eliminates the need for some of the confusing /dev/tty handling in Unix.
Some of the ideas of Plan9 have made it back into Unix. The /proc file system came from Plan9, and some of the ideas around containers can trace their lineage back to Plan9 as well.
Having just dipped my toes in the plan9 waters, I cannot say that I completely understand the full power of what is provided by the file system, but I got a glimpse. Audio and MIDI devices get mapped to files and you can use tools like "cat" and "ls" and "echo" to inspect and configure devices. Instead of learning a new API (like ALSA), the sound API is operations on files.
Much of the power of Plan9 arises through its security model. Processes can determine what parts of the file system are visible to their children, and can mount and bind devices and paths in flexible ways. The file system and the security model go hand in hand.
Downloading and Installing
The 9Front team produces and releases images periodically. They are located here
For the Raspberry Pi the directory listing shows the following.
261MB    Nov 23  11:22   9front-10277.pi.img.gz
20KB     Nov 23  11:36   9front-10277.pi.img.gz.torrent
276MB    Nov 23  11:22   9front-10277.pi3.img.gz
21KB     Nov 23  11:37   9front-10277.pi3.img.gz.torrent
From a bit of trial and error, we determined that 9front-10277.pi.img.gz was for the Pi1, Pi2 and Pi0.
The 9front-10277.pi3.img.gz file is for the Raspberry Pi 3 and Raspberry Pi 4 (and perhaps the 5?).
Installation is simple. Download and burn onto an SD card in the usual way (I used the Raspberry Pi Imager app on Mac). Boot it up and it starts within seconds.
USB Devices
There is a usbtree command for looking at the USB devices. The screen shot below shows my system before plugging in a MIDI keyboard and an USB AUDIO card. The second screen shot below that shows my system after plugging these devices in.
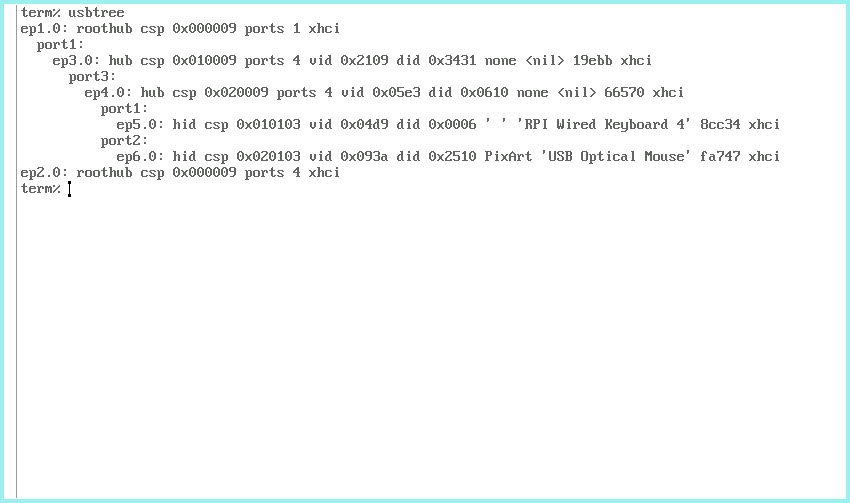
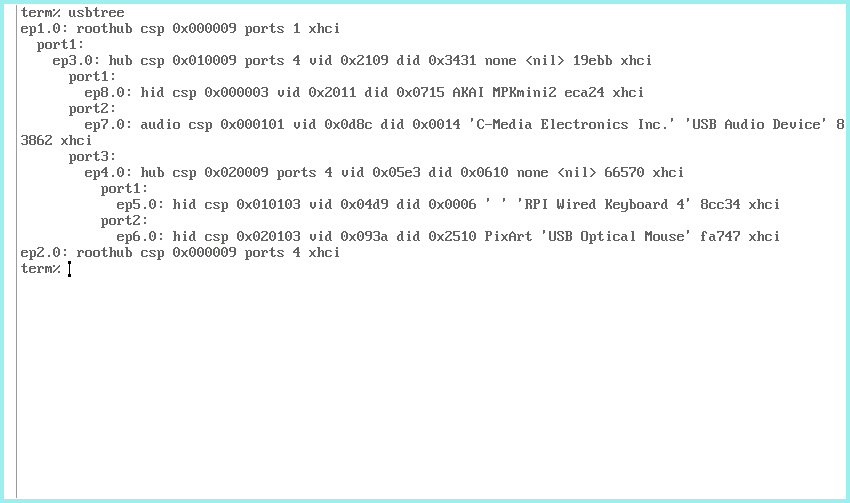
You can see that my Akai MPMini2 MIDI Keyboard is recognized as a MIDI device. But is it usable? What sort of software is needed to access it?
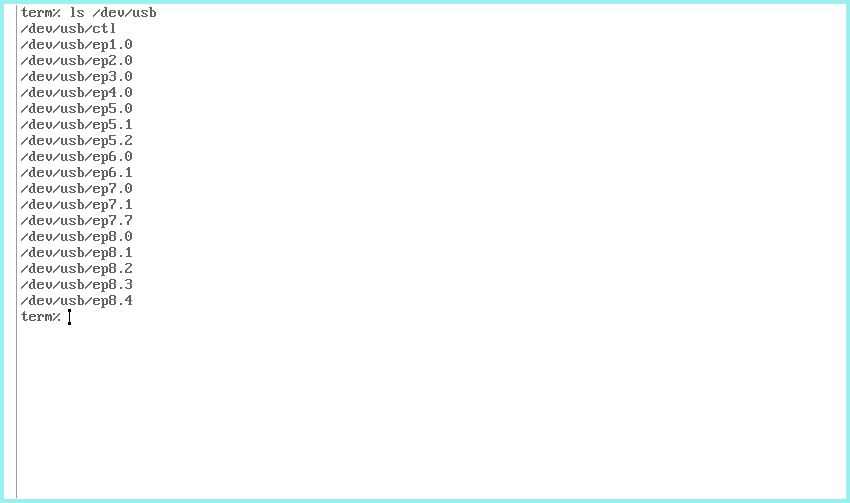
Further investigation shows that USB devices also appear in the file system at /dev/usb. Not shown here is that inside each device is (at least) a /ctl file and a /data file. The /ctl file lists capabilities of each device when read and can modify characteristics when written.
Trying some things out
From the USB list, I could see that my MIDI keyboard had an endpoint. After some trial and error I determined that its data output appears in /dev/usb at /dev/usb/ep8.4/data
I tried cat-ting its output to the terminal screen. The screenshow below illustrates what data showed up on the screen as I pressed keys on the keyboard. MIDI data is a simple byte stream out of the USB device. Neat.
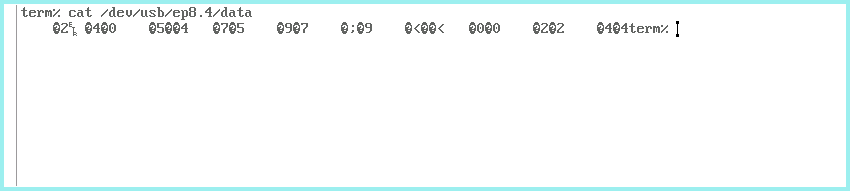
Note: press [DEL] to stop the current running program and return to the prompt.
Audio Resources
After learning a few things about listing files and trying out the editors SAM and ACME, I decided to see how well audio worked. I found the following site (which sounded promising), and also the man page for dmid.
Since I knew that the MIDI keyboard worked, I wanted to see if audio was working. I tried the combination of wadfs and dmid as explained on the link. I plugged a headphone into the headphone jack of the Raspberry Pi. Alas, there was no audio to be heard.
My conclusion is that the 9Front release of Plan9 does not currently have support for the built-in audio of the Raspberry Pi.
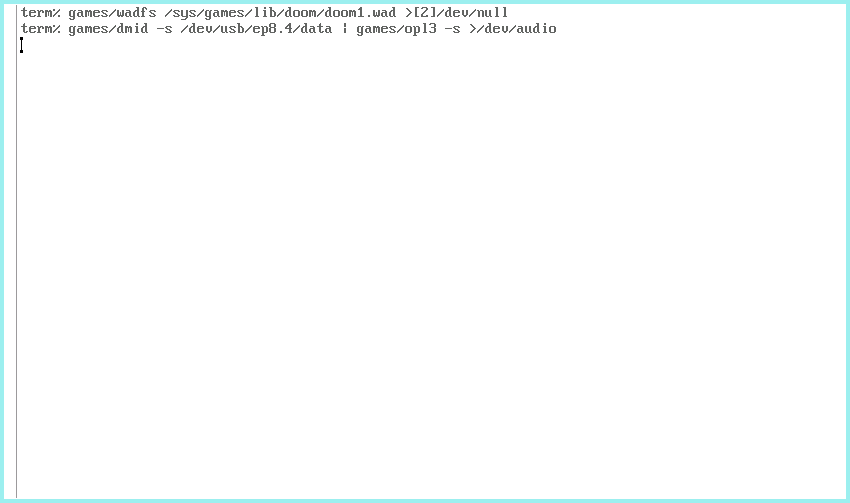
Next, I moved on to trying an external USB Audio card. This proved successful on the first try. Using wadfs and dmid as described worked fine. The latency is very unpredicatable however. I think there is probably some parameter that needs tuning in my configuration.
A Piano Program
Now that I had audio working, I wanted to investigate simple synthesis. Again, from the "nopenopenope" link above, I learned about pianos from "~amavect".
It's nice that git is already installed, so it should be easy to download, compile, and try out the Piano program.
But first, I needed to configure networking. I plugged in an ethernet cable. That wasn't enough. To start up DHCP and configure networking I executed the following.
term% ip/config
term% ip/ping google.com
Networking got set up and I could ping Google.
Next, retrieve the code and compile it.
git/clone https://git.sr.ht/~amavect/music
cd music
mk 7.pianoJI
./7.pianoJI
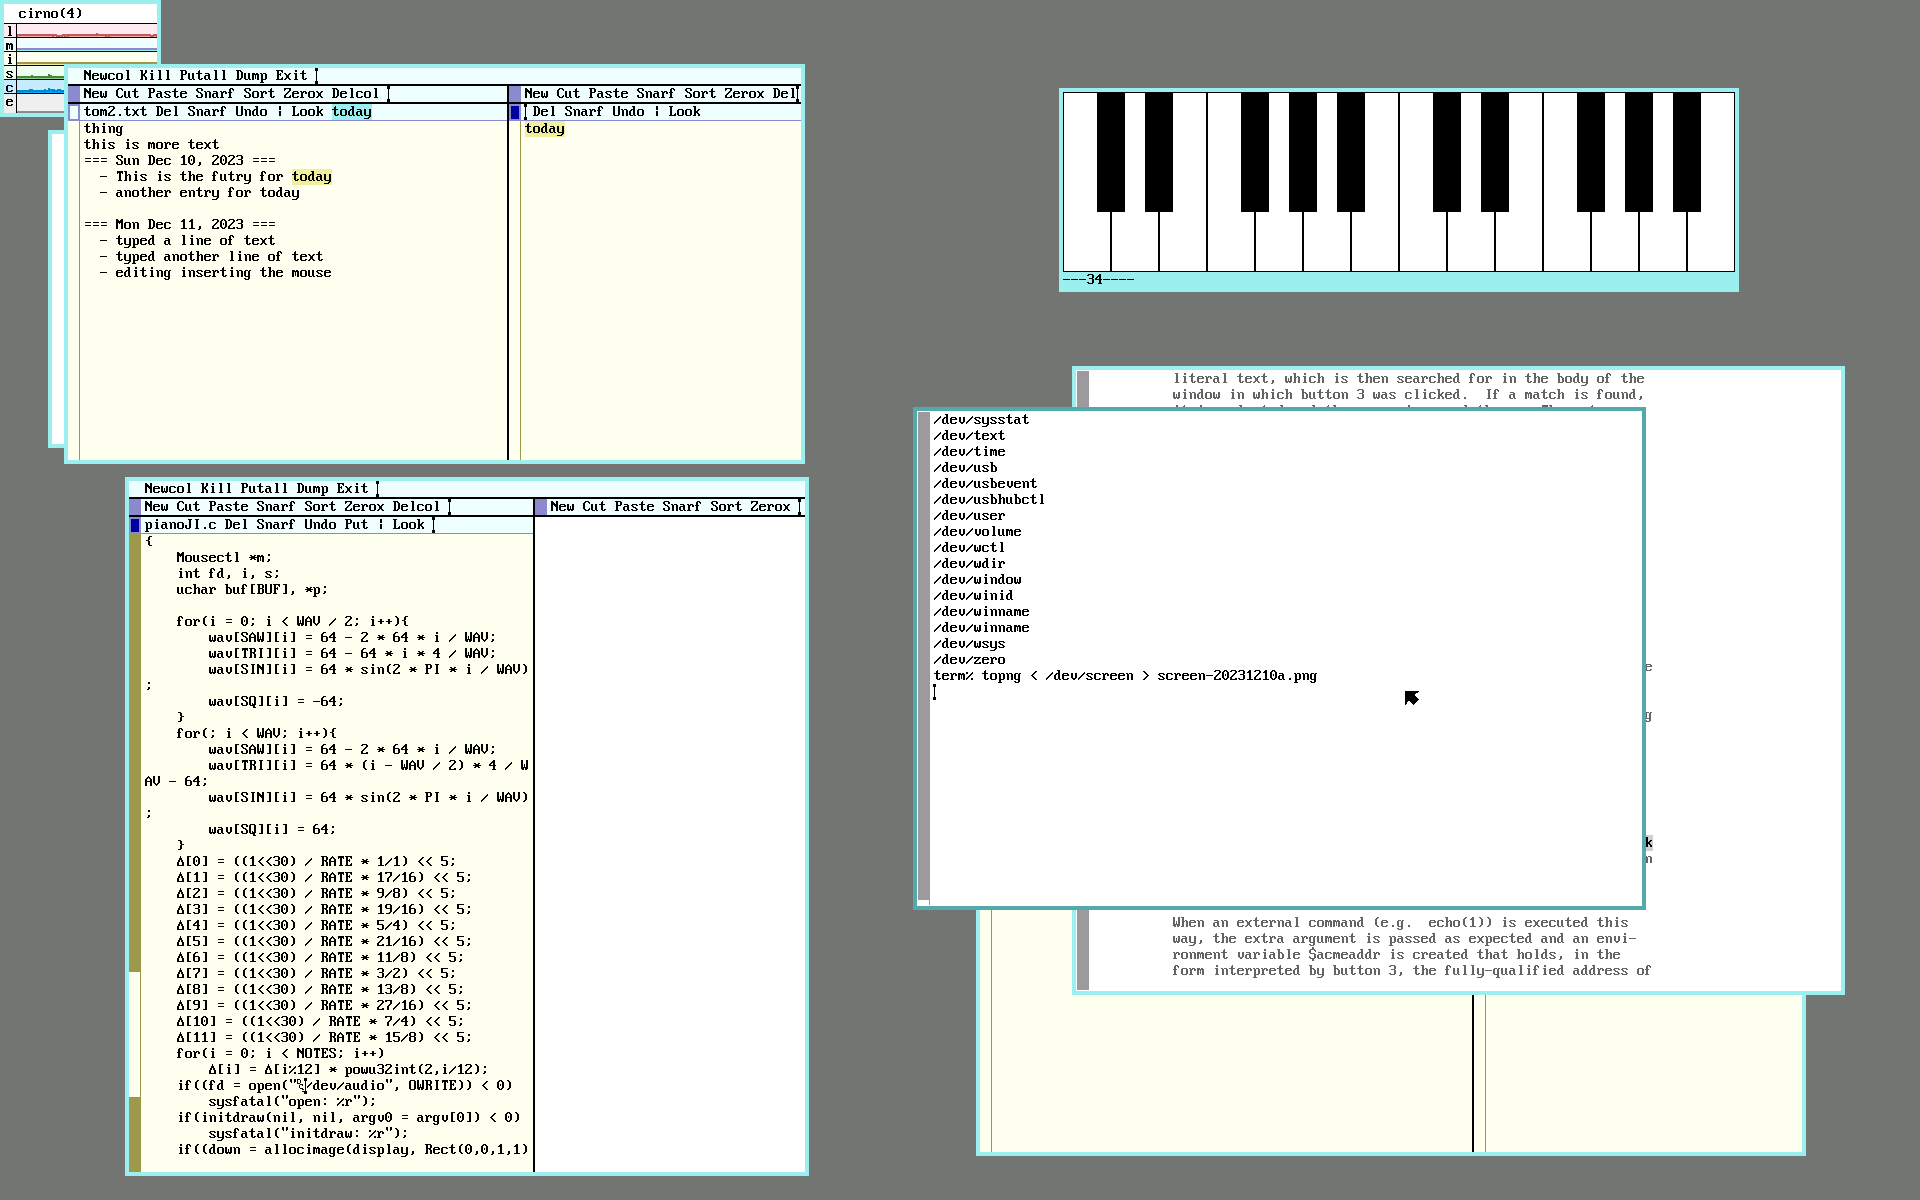
The piano program is shown below. It is very simple - press Left-mouse for key-down, Right-mouse for key-up. Press [DEL] to stop the piano.
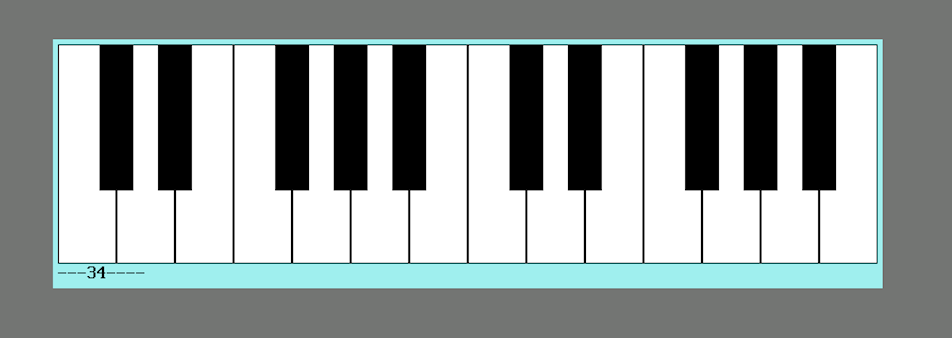
Pressing the Middle mouse button brings up a menu of sounds: sawtooth, triangle, sine and square.
I really love this little program. It has almost no latency, and generates very harsh sounds. It's wonderful and amazing and it is only 260 lines of code.
Conclusion
I am certainly intrigued by this operating system, and also a little taken aback by it. Very little of my Unix/Linux keyboard muscle-memory applies. The terminal works fine, but doesn't obey the usual keyboard shortcuts I have grown accustomed to. The editors SAM and ACME require a new way of thinking about what you are trying to do. A few Unix commands are here, but some are reformulated in new ways (see kill, for instance).
But as I've read elsewhere, if you come to Plan9/9Front expecting the old way of doing things, you're missing the point. So I'm letting go of old habits, and have spent some time learning the basics of SAM and ACME. I can now edit files. For this article, I performed screen captures using topng and transferred the images off of the 9Front computer using a combination of ssh and cat. It's pretty fun. Even learning what kill does and how to pipe it to rc is a little adventure. This experience has shown how learning how a different set of building blocks can yield a new way of thinking about a computer system.
Addendum
The format of the MIDI information read from the USB devices corresponds to the raw format defined in the USB reference below.
https://www.usb.org/sites/default/files/midi10.pdf
Data is read in chunks of 32-bits at a time, with the first byte defining what type of payload each chunk contains.